
SSH is a protocol where you can access your Synology NAS on a different level. For some things to work you have to access your Synology NAS via SSH. Here we explain how to set it up and how to connect.
Adding SSH service to the Synology NAS
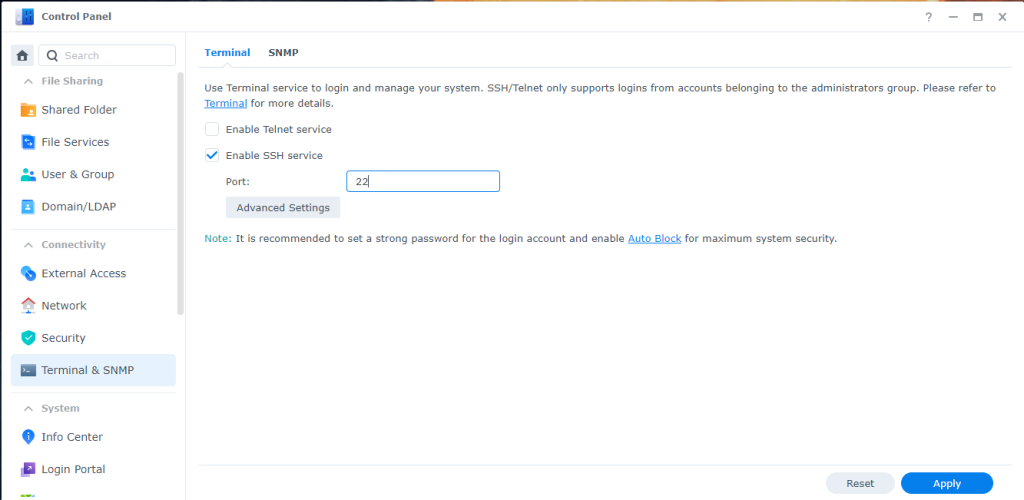
Go to Control Panel > Connectivity > Terminal & SNMP. Click on enable SSH Service and you can select an alternative port. Standard is 22, but you can choose any port. Adding a number to 22 (for example 223), is already enough for anyone to guess the access port.
Connecting to SSH from Windows
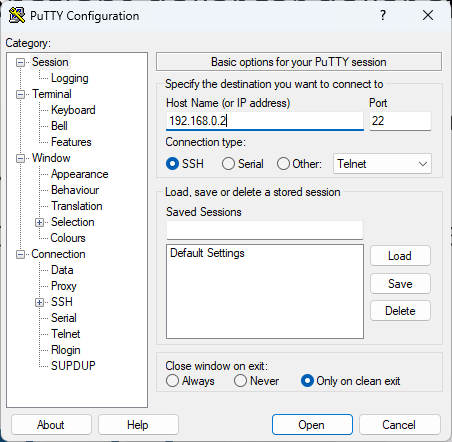
A good little tool to make an SSH connection to Synology is putty. You can download it from here. When you want to connect to the Synology you fill in the local IP address of your synology and the port number you filled in before. This opens up a black screen where you have to login with your administrator account and password. With that you have access to your Synology. For the most common commands that you can do in SSH here is a link: Basic SSH Commands – List of most used Putty commands in Linux.
Adding NANO as an easy editor for SSH
To edit text and configuration files in SSH can be quite challenging. The build in text editor is “Vi” and is not the easiest to navigate. A better editor is “nano” and can be installed on Synology too.
Go to Package Center > All Packages > Settings > Package Sources. Click on “Add” to add a new community package resource with the following details:

- Name: SynoCommunity
- Location: http://packages.synocommunity.com
In Package Center there should now be an extra entry on the right called “Community”. There you can now search for: “SynoCli File Tools”. When this application is installed you can now use nano as text editor.