
Now you have your main domain name registered, your external IP address is automatically updated through DDNS and you have a wildcard certificate to secure your domain and subdomains, we can start setting up subdomains and assigning them to different services. We’ll start with the DSM service itself. For example you can create the subdomain dsm.test.org, which when typed in a browser would open the DSM of your Synology NAS, instead of typing https://yourlocalIP:5001 or http://yourlocalIP:5000. We assume with the further steps that you are using Cloudflare for you management of your DNS records.
The easiest way to register a subdomain is to add a CNAME (Canonical Name) record to your DNS. The CNAME record links the subdomain to another domain or your root domain and not to an IP address. The advantage is that you only need to update or register your IP address in one record and have all other records that need to refer to the same IP address, point to that first record. For example subdomain for our DMS is dsm, which would make the address dsm.test.org. This how it would look like in Cloudflare:
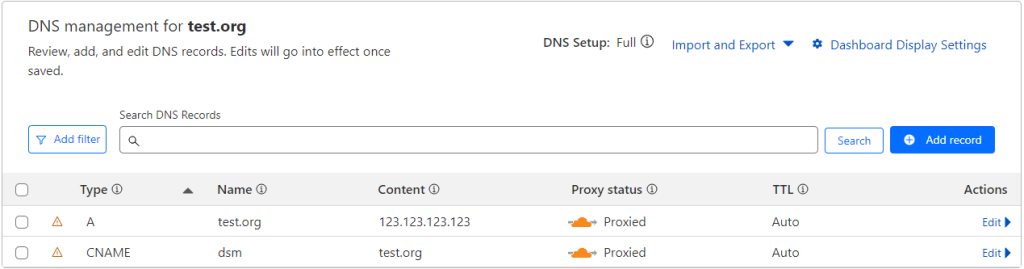
The CNAME record dsm is referring to test.org. And the A record for test.org (which is actually @) is referring to our IP address 123.123.123.123. This cause both dsm.test.org and test.org to point to 123.123.123.123. A DNS change can take up to 24 hours before it works. In general it is my experience that DNS records registered with Cloudflare are almost immediately effectuated. When you now type in dsm.test.org it will actually not go anywhere because we haven’t told Synology to actually listen to this address.
When you go to Control Panel > System > Login Portal > DSM you can indicate a customized domain. Synology now automatically knows when you type dsm.test.org to respond with the DSM login page. You can also enable HSTS, because you have a valid certificate for the connection.

You DSM would still not be able to be reached from this address, for the simple reason that your external IP address and port are not connected or forwarded to your Synology NAS. By entering a customized domain, you no longer have to use the DSM ports, because Synology links this customized domain to the HTTPS port, which is standard 443.
Opening the 443 port
Once we have registered a subdomain we can start linking it to services on our Synology NAS. Every connection to your services need 2 components, an IP address and a port number. You could compare the IP address to a street and the port number to a house number. Each house on the street would offer you a different service. In principle only one service can be offered by one house. Port numbers lower than 1024 are so called protected port numbers. From 1 to 1024 there are many port numbers that are expected to be connected to certain standard services. Here is just a sample of standard port numbers with the expected service:
21 – File Transfer Protocol (FTP) service
25 – Simple Mail Transfer Protocol (SMTP) service
80 – Hypertext Transfer Protocol (HTTP), unsecured web service
443 – Secured Hypertext Transfer Protocol (HTTPS), secured web service
As the Synology is listening on port 443 for the domain dsm.test.org, we need to forward on the router port 443 to the IP address of the Synology NAS. Once this port-forwarding has been done, you can then reach your DSM through https://dsm.test.org.
Be careful, with this forwarding you have opened your DSM Synology NAS to the internet. Make sure you have secured your NAS properly. Delete the customized domain name if you are not comfortable with this or you are not aware of the dangers.